Why Use Plywood Sealer for Better Protection?
Plywood Sealer is often treated as a finishing extra, but it can help protect exposed panels from everyday moisture. The vulnerable spots are easy to miss: raw edges, screw holes, and cutouts beneath a sink or workbench. A thin, even film can slow moisture entry and reduce staining or surface wear. It cannot make every plywood panel waterproof.
The USDA Forest Products Laboratory’s Wood Handbook (FPL-GTR-282, 2021) explains that wood exchanges moisture with surrounding air and can change dimensions as its moisture content shifts. The handbook places the fiber-saturation point for most wood near 25–30% moisture content, though species and conditions vary. That matters. Plywood is layered, but its edges still expose wood fibers. R. Bruce Hoadley, author of Understanding Wood, describes wood as “a hygroscopic material.” His concise observation helps explain why sealing deserves attention.
Good preparation counts. Sand dusty surfaces, check the product label, and apply compatible coats according to its instructions. Pay special attention to edges, where a brush can leave thin or missed areas. I would not assume one coat solves every problem; coverage, exposure, and maintenance all affect results. A sealer may also change the panel’s color or affect later paint and adhesive bonding. Test a small offcut first. It is a modest step, and an easy one to skip. Choosing and applying Plywood Sealer carefully can help extend a panel’s useful life, while realistic expectations keep protection claims honest.
What Plywood Sealer Is and How It Works
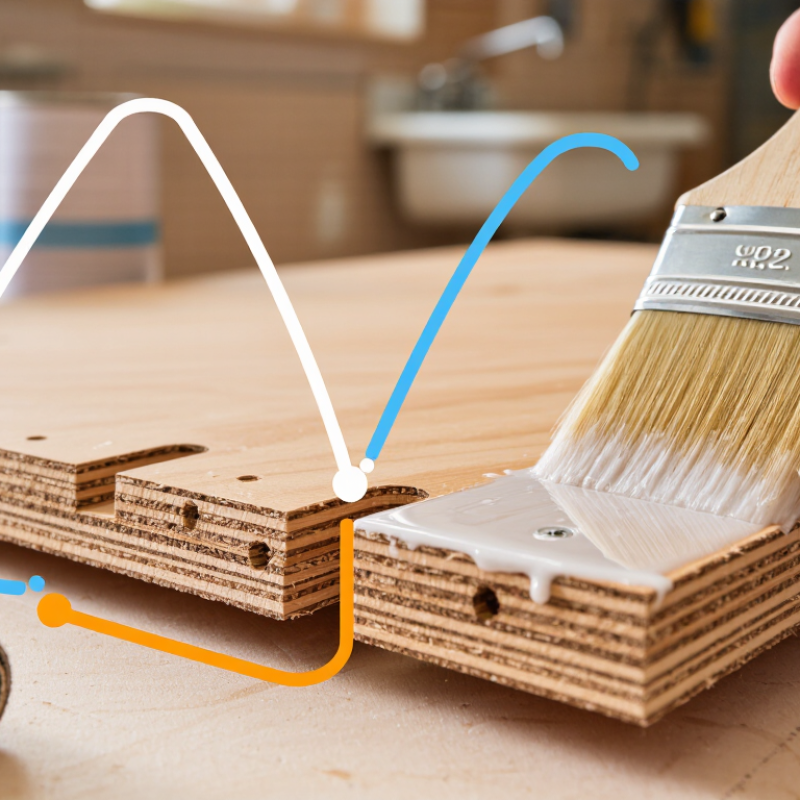
A plywood sealer is a coating that reduces how quickly liquid water enters the panel and slows moisture exchange with the air. Depending on its formulation, it may soak into the surface or form a thin protective film. It does not make plywood waterproof. Think of a damp workshop floor: splashes bead on a sealed face, but exposed cut edges can still darken and swell. Edges need attention.
The USDA Forest Products Laboratory’s Wood Handbook—Wood as an Engineering Material (FPL-GTR-282, 2021) places wood’s fiber saturation point at roughly 30% moisture content, with variation by species. Below that point, changing moisture levels can cause wood to shrink or swell. Plywood’s cross-laminated veneers help limit movement, but they do not prevent moisture damage. A sealer slows wetting and drying; it cannot correct poor drainage or standing water. Apply it to clean, dry faces and especially cut edges, following the product’s coverage and recoat directions. I would not assume one coat is enough. The surface may look covered while corners remain thirsty. Sealers also wear, so inspect areas near sinks, doors, and floors periodically.
How Sealer Protects Plywood from Moisture and Wear
Plywood can look dry while its edges quietly draw in water. A sealer slows moisture entry by covering faces, cut edges, and drilled holes. The edges matter most. The USDA Forest Products Laboratory’s 2021 Wood Handbook places the fiber-saturation point near 30% moisture content for many wood species. Below that point, changes in moisture can make wood shrink or swell. Veneer layers limit movement, but they do not make a panel immune. Repeated wetting can cause edge swelling, rough fibers, and stress around bond lines.
A suitable coating also helps shield the surface from scuffs caused by shoes, boxes, or workshop tools. Choose a floor-rated finish for foot traffic; a basic water-repellent sealer may not resist abrasion well. Apply it to clean, dry plywood, paying extra attention to seams and exposed edges. One missed seam can matter. The coating is not a waterproof repair: leaks, standing water, and trapped dampness still need fixing. APA panel-care guidance also stresses protecting engineered wood from prolonged moisture exposure. Inspect high-contact areas periodically, and renew the finish when it wears thin or water no longer beads on the surface.
Which Plywood Surfaces Benefit Most from Sealing
Plywood benefits most from sealer where water can enter quickly: exposed edges, saw cuts, drilled holes, and corners around sinks or exterior trim. These areas reveal the plies and can swell, roughen, or separate after repeated wetting. The broad face matters too, especially on outdoor panels, bathroom cabinetry, and workshop benches exposed to spills. Seal all faces and edges when moisture may reach both sides. Edges matter most.
The USDA Forest Products Laboratory’s 2021 Wood Handbook notes that decay fungi generally need wood moisture content above about 20%. That is not a safe target for plywood; it shows why persistent dampness deserves attention. APA’s Engineered Wood Construction Guide distinguishes panels intended for temporary construction exposure from panels rated for exterior use. Even exterior-rated plywood benefits from protected cut edges and maintained coatings. A sealer slows water uptake, but it cannot correct poor drainage or standing water.
Preparation is easy to overlook. Remove dust, smooth rough cuts, and follow the sealer’s instructions for drying and recoating. Check around fasteners too. A missed hole can become a small entry point. Sealing every surface may not be necessary in a dry indoor project, and coatings can wear unevenly under traffic. Inspect high-use areas each season; the protection is only as dependable as its weakest edge.
How to Choose and Apply a Suitable Plywood Sealer
Choosing a plywood sealer starts with the panel’s location and finish. For indoor shelves, a water-based sealer may suit a low-odor workspace. Outdoor projects need a product rated for exterior exposure, though sealer alone cannot prevent damage from standing water or poor construction. Check the label for compatibility with paint or varnish. Then test it on an offcut.
Preparation matters. Remove dust and smooth rough faces with the grit recommended by the sealer instructions. Plywood edges absorb more liquid than broad faces, so brush them carefully and watch for dry-looking patches. Apply a thin, even coat with a clean brush or roller. Let it dry fully before adding another coat. Don’t rush it.
A patchy first coat is common, especially on cut edges; it may need another light coat rather than a thicker one. I’d inspect the surface in side light, where missed spots show clearly. Follow the product’s ventilation and drying guidance, and avoid sealing damp plywood. Small details count. A scrap test can reveal changes in color or sheen before the finished panel is coated.
How to Maintain Sealed Plywood Over Time
Why Use Plywood Sealer for Better Protection?
How to Maintain Sealed Plywood Over Time
A sealer slows water entry, but it does not make plywood waterproof. Maintenance starts with close, regular inspections. Check edges, seams, screw holes, and cutouts, where moisture can sneak in and cause swelling. Pay extra attention after heavy rain or a spell of humid weather. Small checks matter.
The USDA Forest Products Laboratory’s Wood Handbook explains that wood generally reaches its fiber saturation point at about 30% moisture content; below that point, changing moisture levels can cause wood to shrink or swell. Plywood construction helps limit movement, yet exposed surfaces and edges still need care. Look for dull patches, hairline cracks, lifted veneer, or water that no longer beads. A glossy finish can be misleading.
Clean dirt with a soft brush and mild soap, then let the surface dry fully before recoating. Follow the sealer label’s preparation and drying directions, and avoid applying a fresh coat over peeling or damp areas. Recoat timing depends on sunlight, rain, foot traffic, and product type, so a fixed calendar interval can be unreliable. That assumption deserves a second look. Keep a simple inspection note with the date and any repairs; it makes gradual wear easier to spot.